Showing posts with label Cards. Show all posts

Monday, June 25, 2012

H2H - Weddings & A Fond Farewell

This week at H2H our theme is weddings, but before I get to my contribution I'd like to take a moment to say thanks!  My tenure as a design team member is now over, and I'm very grateful to have had the opportunity to create & share with the H2H community.  Thanks to all those of you who stop by to read my posts, and especially to those who take time to leave a little message.  I've enjoyed seeing new crafters join the H2H community and always look forward to seeing what "the regulars" have to share. It's been a fast six months...

Now on to my card -

I went a little "Art Philosophy" crazy with this one.  I used it to create the borders which I weaved with ribbon and added bitty sparkles to, I used it to make the frame for the sentiment, and I used it to make the two white flowers.


The sentiment is from an old Stamp of the Month, I think.  It had a frame around it so I created a mask that would allow me to stamp just the sentiment.

And that's it from me!  Thanks again for making my time on the design team fun & inspirational.  I'm looking forward to participating in future H2H challenges!

Monday, May 14, 2012

H2H - Polka Dots & Stripes

This week at Heart 2 Heart we're playing with polka dots & stripes.  My first thought was the Dotty For You paper pack - of course!  I took a moment to look at the inspiration projects, and found the inspiration for a Mother's Day card.

This is the specific item I based my creation on: 


I liked the circles on the layout and how the title worked with it.  So I pulled out my 1.25" circle punch and used it to punch out pieces of patterned paper.  Then I had the Cricut crank out a bunch of 1.5" Colonial white circles.

I spent FOREVER laying out the circles to get them to look just the way I wanted them to.  It was a lot trickier than I expected!  Some arrangements just did *not* look right.


To embellish I used a few brads & buttons and a pair of flowers.


I really like the original inspiration layout, and might give that a try sometime, too.  At least I won't have to mess around with the circles again - Close To My Heart has them perfectly arranged and it would be easy enough just to duplicate what they did.

A little dotty, a little stripey...hope you enjoy it!

Monday, April 30, 2012

H2H - April Showers Bring May Flowers

This week at Heart 2 Heart we're playing around with flowers!  I have so many flower stamps and there are so many possibilities with the Art Philosophy Cricut cartridge, that I didn't know where to begin.  I've been seeing a lot of "rainbow" creations lately, and that provided the inspiration for my card.


I started by stamping the same flower from the Card Word Puzzle Stamp Set 5 times and cutting them all out.  I knew I wanted to cut the front of the card a little short and let the flower petals hang over the edge. Next I pulled out that popular Dotty For You Paper Packet and created the vertical bars.


I pulled out some of my older stamp sets to create the sentiment, which I stamped on a shape from the Art Philosophy Cricut cartridge.  One Mother's Day card down, one to go!  I hope you decide to join in the fun of this week's challenge at H2H!

Monday, April 16, 2012

H2H - Stitching!

This week at Heart 2 Heart we're asking you to show us what you can do with stitching!  I've done "faux" stitching before, but just recently tried using the new CTMH ruler to do "real" stitching.  I used to cross-stitch, and I'm finding it fun to play around with needle & thread again.

This week, I made a birthday card in Lagoon, Smoothie, and Sunny Yellow.  I stitched the background swirls with black thread.


To help me get the swirls just right, I stamped some swirl images on the back side, like this:


Then I used the ruler and stylus to poke tiny holes along the images.  I didn't bother with every single swirl.  By flipping the cardstock over, I could see what my design would look like.


Originally, I planned to stitch the entire swirl, but after I started, I realized I liked the "dashed line" look better.


Then I used the Art Philosophy Cricut cartridge to dress-up the card, and finished by adding some bling.


I'm very excited to see what sort of stitching projects you come up with!  I hope I'll see you around at H2H!

Thursday, November 17, 2011

H2H - Metal Mania

I'm a little late getting to this challenge from Heart 2 Heart, but I really wanted to play along because I hardly ever use metal in my crafting.  I'm a little intimidated by it, I think because I'm not sure what adhesive to use with it.  I ordered the metal photo hangers from Close To My Heart a long time ago and have been working up the courage to use them.  I crafted this card for my Dad for his birthday.


I used the You & Me Paper Pack and made the tag from a recent Stamp of the Month set...I think it was called Limited Edition?  The photo hanger clipped on easily with the brads included (totally NOT intimidating).


And I did a little bit of stamping on the inside...


Thanks for stopping by to visit!

Saturday, November 05, 2011

H2H - Color Challenge

 This week at Heart 2 Heart, they are spotlighting the colors of Autumn Terracotta, Bamboo, and Juniper.  I used this palette to make the circle card here:


Of the three colors, the only one I had an ink for was Juniper, so I switched to using Cocoa to do most of the stamping.  The leaves are from Nature's Vein, the sentiment is from Unscripted (as is the border I created on the band of Juniper), and the swirl border is from Wicked.  I curled the edges of the leaves to add some interest.

Monday, September 05, 2011

H2H - Color Combo

This week we're supposed to share our favorite color combo at Heart 2 Heart.  I've been working on things for my daughter lately and the color combo I've been using the most is Hollyhock, Blush, and Pear...from the Sophia Paper Pack!  Not very original, but I really do like it.  I like how the Pear really stands out.

First, here are a few photos of the invitations I made for my daughter's first birthday party:


I've also done some scrapbooking with the same colors.  The first layout I posted about previously.  Here's the link if you want more details.


And here are a few new pages I've finished recently.  


If you look closely at the layout above, you can see that on the right page I stamped some flower images and used foam tape to put them on top of the patterned paper.  It gives a nice 3D look to the paper.


On this layout I wanted to use a lot of pictures and wanted to minimize the paper I used, to make it last a little longer.  I did mat the photos to give the layout a little extra color.

I've gotten down to the point where I really only have a few scraps of this paper pack left.  I'm not sure if I'll be able to squeeze out one more layout, or if it will be time to switch to something new...stay tuned!


Friday, August 12, 2011

Sympathy Card - A La Card Monkey

I was invited by the kind crafters at A La Card Monkey to be one of their Guest DTs for this week's challenge - a Sympathy Sketch.  It took me awhile to settle on a color scheme.  Originally I was going to do black and white with a splash of color, but the more I played around with the Cocoa brown, the more I liked it.  

I began by heat embossing the patterned background to give it interest and make it a little fancy.  I stamped the birds in blue after rolling the edges in cocoa to give them that two-tone look.  I put them on some foam tape to make them stand out.  The sentiment panel needed something, so I added a strip of blue there.

The bow and ribbon add the final finishing touch.  Sympathy cards aren't ones I usually make, so this was a nice change of pace.  And I really had fun with the different stamping techniques.  All products are CTMH.


Monday, August 08, 2011

H2H - Simple Sun Card

The theme this week at Heart 2 Heart is Hot, Hot, Hot!  In celebration of summer (which has actually taken a cool turn around here, ironically enough) I crafted this simple sun card:


I thought about embellishing it, but ribbon or more stamped images just made that beautiful blue sky look too cluttered.  So this design stayed clean & simple, which also made it relatively quick to put together - a nice bonus!


The sun is made with a 1 1/2" circle center, stamped with images from Dream Big and Connections on Sunny Yellow cardstock.  I then stamped the pennants from the Pennant Alphabet using Sunflower ink on Sunny Yellow and Sunflower cardstock.  The sky is...well, Sky cardstock, of course!  Last, I used the clouds from Around the Block and stamped them in Pacifica ink.  The sun is attached with foam tape.

The colors are more bright and cheerful than I was able to capture on this cloudy day.  Enjoy the rest of your day!

Monday, August 01, 2011

New Product Blog Hop

The wonderful Tresa Black at Fabulously Artsy is hosting a CTMH new product blog hop.  I have a small contribution - a set of 3x3 thank you cards I happened to be working on.


I used the new Elemental Paper Pack, as well as the Zoology Stamp Set.  The card bases are made from the Desert Sand cardstock included in the paper pack.  Then I layered on some of the new, heavier-weight B&Ts, flipping over the paper on two of them to get different patterns.  

I love the Zoology Stamp Set, but those little numbers on the tickets are ridiculously hard to work with!  They are SO tiny.  If you use them, plan on going for a fun, random pattern to your numbers instead of trying to get them evenly spaced in a line!  It will save you a lot of heartache (and maybe a headache, too)!  The animals in the set are adorable.  I used sentiments from a different set to complete the tickets since I wanted these to be thank you cards, although the stamp set does come with some cute phrases.


You can continue hopping by using the links below.  Thanks for visiting!

Tuesday, July 26, 2011

H2H - Converse Sneaker Card :)

I needed a birthday card for my nephew and was having trouble thinking up something fun.  When I first saw the H2H Sketch for this week, it didn't seem like it was going to help me out much.  But I kept staring at it, and one thought led to another, and here's where I ended up:


My Converse-inspired birthday card!  My nephew is athletic and this just seemed like a fun idea.  I started googling Converse sneakers and I was inspired by the styling of them, and I knew I could make it fit the sketch.  I did alter the sketch a bit - rotating it, and changing up the square to be the Converse circle.
I started with a piece of Tulip cardstock which (even though you can't really tell from the photo) has been lightly sanded to make it look like canvas.  Next I used white embossing powder to make the stitches (from the You & Me Stamp Set).  The alphabet is Tiny Typewriter.

If I were to do this one over again, I would have used liquid glass on the shoelace grommets just for fun. I really do want to make more of these cards.  There are so many cool Converse out there to be inspired by.

Tuesday, July 12, 2011

Hello Again!

It's been awhile since I posted and even longer since I've participated in any card challenges...but I'm back!  I got busy with summer happenings, though I have been scrapbooking and card-making.  Just haven't had the time to sit in front of my computer and share.

This week's Heart 2 Heart Challenge is to share a completed project and your inspiration for it.  I needed to make a birthday card for my brother (hi Jeff!) and my inspiration came to me during my shower...from my bathroom tile!  I've always liked the border, and I thought it would be a nice basis for a masculine-type card.


This border became this card...


The paper is from Passages.  I used the You & Me Stamp Set for the ticket and the stitching.  I used a different set for Celebrate, and then discovered that I could have used the You & Me Stamp Set for that too.  Oh well.  All the edges of the "tile" pieces have been inked in Cocoa ink.


Tuesday, June 14, 2011

Teacher Gift - Thank You Card Box

I started making a set of Thank You cards to give as a gift for my son's teacher a few weeks ago.  Then I found an awesome template for a card box, and decided to try it out.  I'm going to have my son draw something for his teacher on the white panel on the cover, but for now it's blank.  I made the box from Tulip cardstock and accented it with Clover Meadow and Black cardstock.  It has a ribbon closure.


This is the inside.  There are two compartments.  Each one holds five cards and five envelopes.  I used white embossing powder on the black cardstock to do the letters and numbers.  It looks a little "dusty" up close, because I wasn't super picky about cleaning up the stray embossing powder.  It makes it look a little like a chalkboard, which I thought was cool.


These are the cards.  I made 5 of each and stamped matching envelopes.  I made one set of cards awhile back (there's a post on it), but I decided to add the alphabet border and then I made another set with the reverse color scheme.


This is a side view of the box when closed.

Tuesday, June 07, 2011

Mojo Monday 194 - Father's Day Card

I'm a little nervous about sharing my take on this week's Mojo Monday sketch.  The sketch was my inspiration, so I think it's ok for me to link my card.  It just isn't the most literal sketch interpretation.  Anyway, those of you who visit can let me know if my card resembles the sketch enough to "count".  Here they are side-by-side:

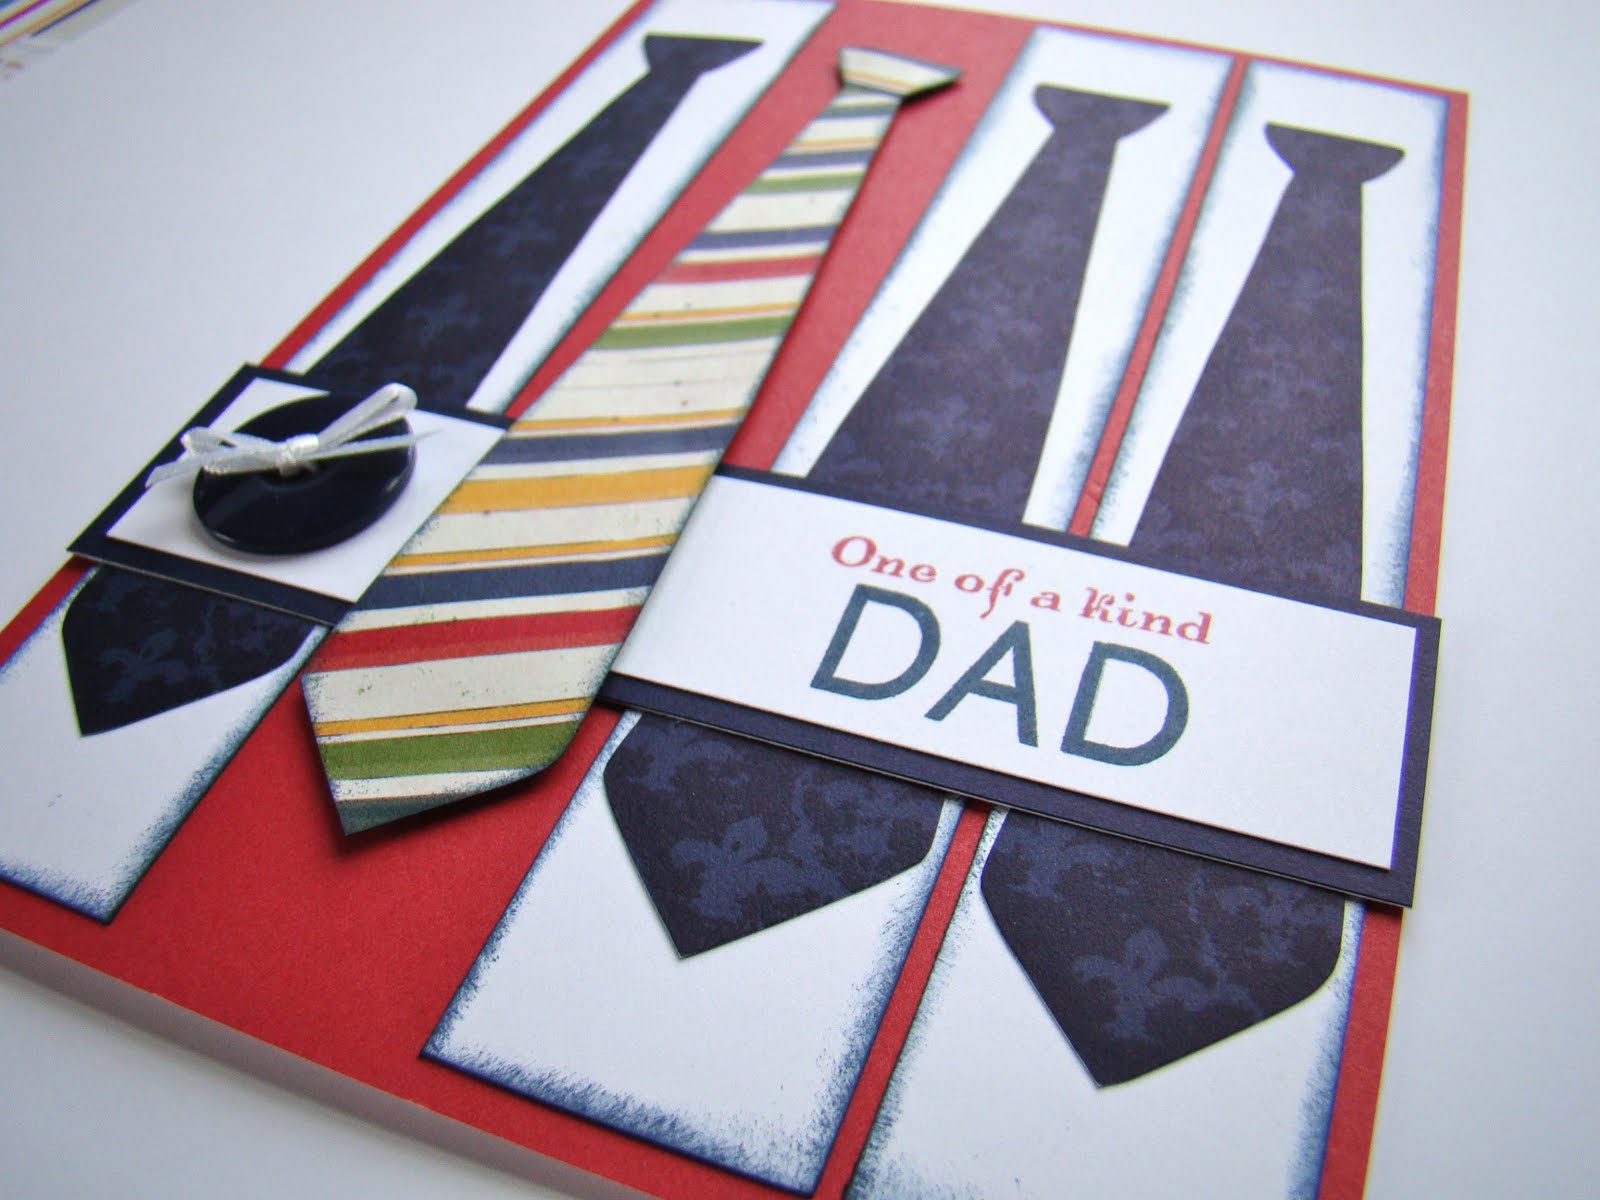
I've got the four panels going on, and the points of the ties look a little like the scallop border.  I used the horizontal band, but no ribbon on top... and the scallop circle got toned down to the button with ribbon.

The four panels made me think of the tie stamp that's from the Wonderful Friend Stamp set.  I stamped three Outdoor Denim ties on Outdoor Denim cardstock, and then stamped one on an old piece of School Zone patterned paper and flipped it over so the stripes would show.


I liked having the "One of a kind" tie on top of the sentiment band, and it's popped up with some dimensional adhesive.  I manufactured the sentiment from the Chairs To You Stamp Set and the Pennant Alphabet.


I tied some ribbon through one of those new buttons to add the finishing touch.  All products are Close To My Heart.  So what do you think?  Can you see the sketch in my card??

Tuesday, May 31, 2011

Mojo Monday - Father's Day Cards


It's a Round or Square week at Mojo Monday.  I really loved the sketch for this week and couldn't wait to try it out on some Father's Day cards.

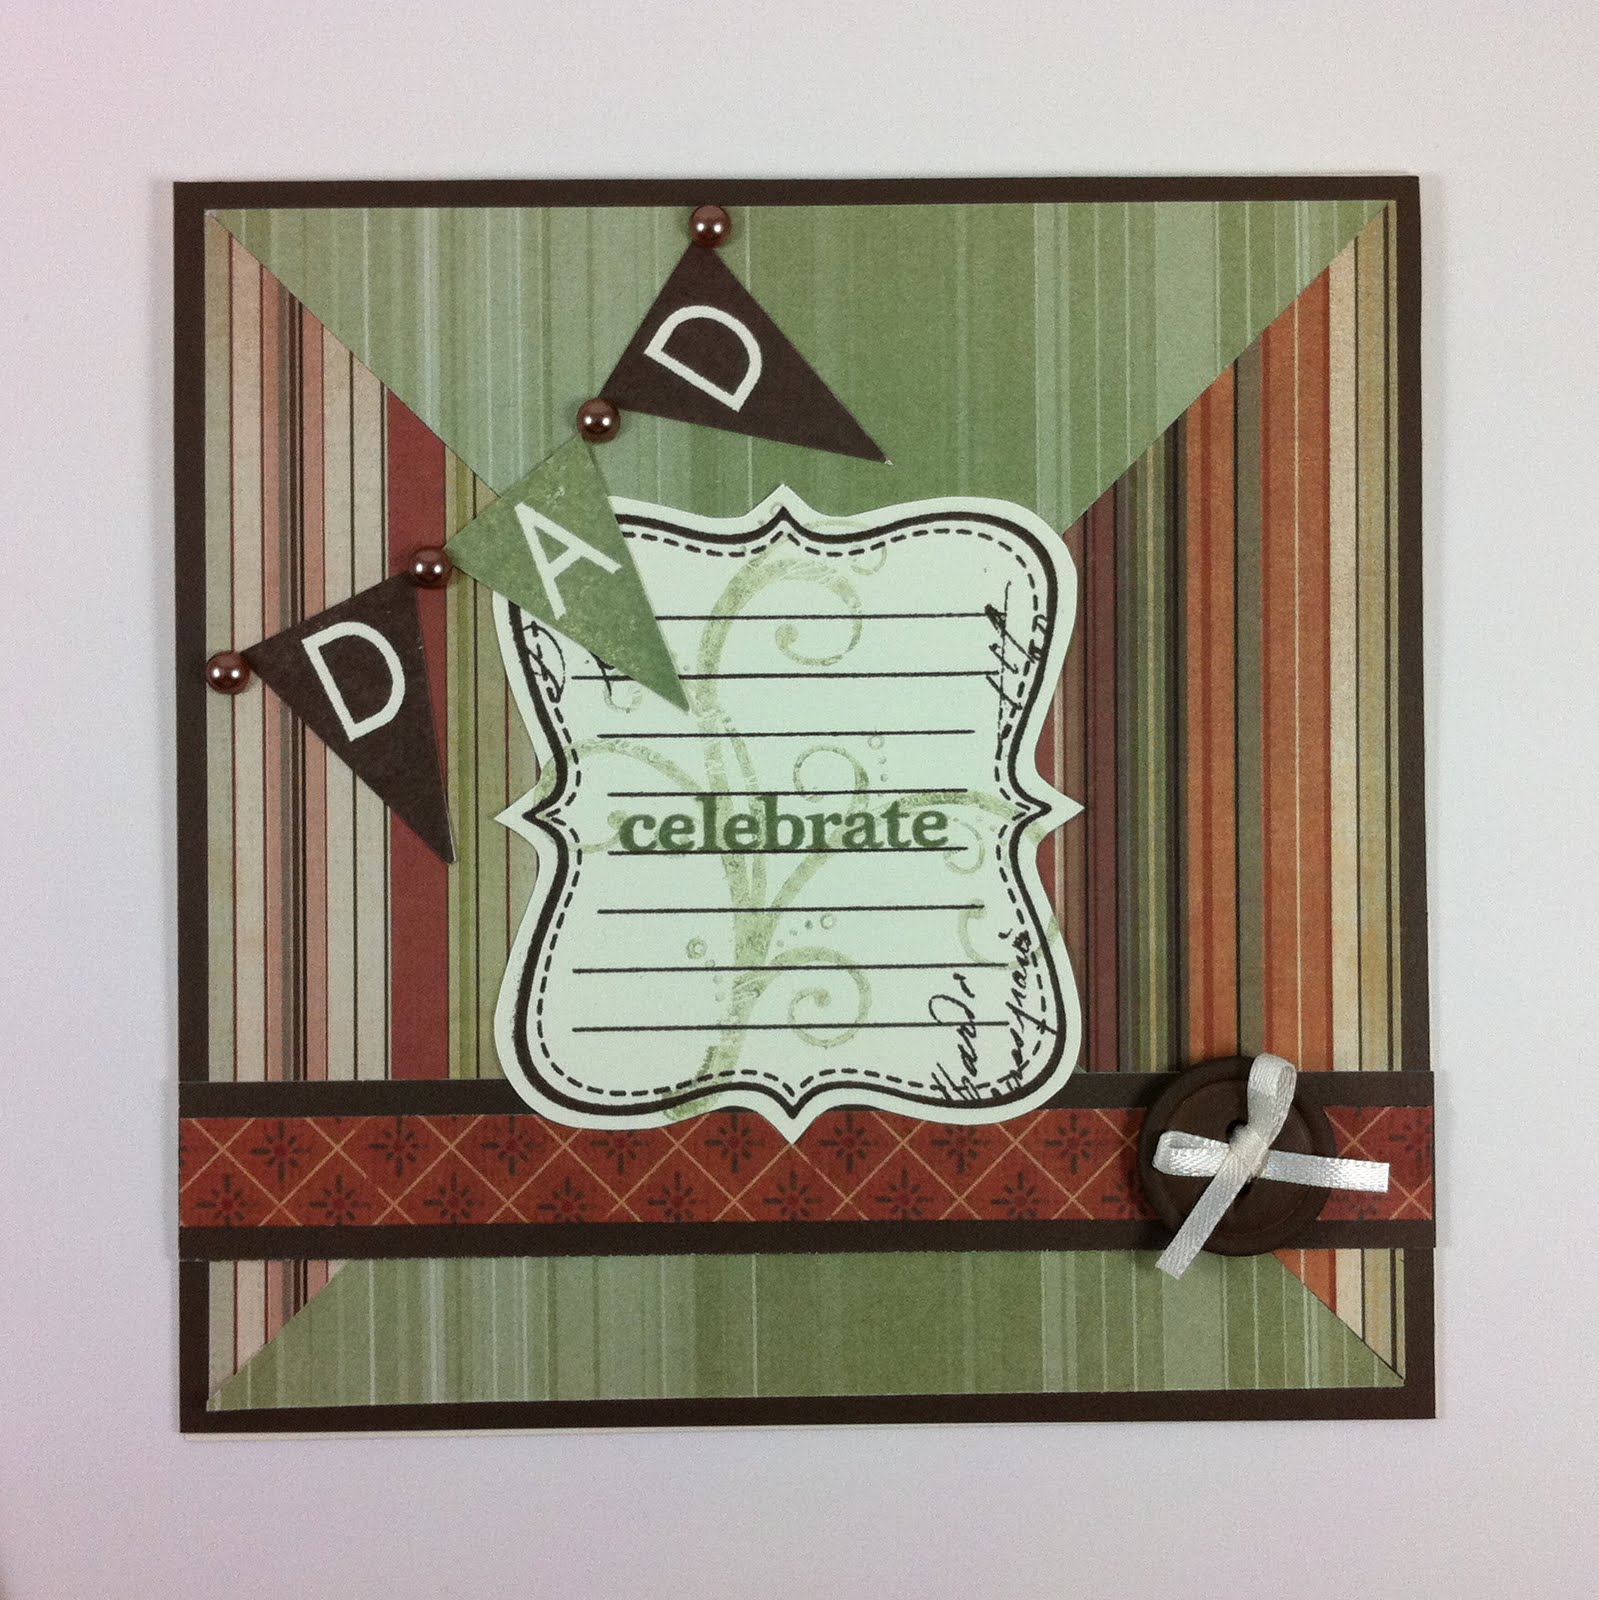
I used the Passages Paper Pack to make two slightly different variations.  I also used the You & Me Stamp Set, and the Pennant Alphabet.  The ink colors are Cocoa and Garden Green.

The first version I made was this one.  I cut out the text box and stamped a second-generation swirl image behind the sentiment.  I didn't have any cute ribbon to match, so I used a strip of patterned paper mounted on Cocoa cardstock.  I used the reddish/copper toned Opaques from the Cocoa collection to link the pennants.
This is my second version.  I wanted to use the same basic materials in a slightly different way.  This time I left the text box as a rectangle and mounted it on Cocoa cardstock.  I changed the image I stamped behind the sentiment.  This time I put my patterned paper ribbon in front of the text box.  I arranged the pennants into a fan shape with the tiny Opaques at the corners and a larger one at the point.  I stamped some extra pennants in solid and polka dot and layered them beneath the button for a sort of bow-tie look.  I had a lot of fun making these cards - it was one of those times when everything fell into place.  Love this sketch!

LinkWithin

Related Posts Plugin for WordPress, Blogger...